
Wellington Phoenix vs Brisbane Roar FC, 2019-20 Australian A League, Regular Season
· Australian A-League MenGary Hooper secures Wellington Phoenix A-League finals spot after draw with Roar
A-League
Match Commentary
- 0': Lineups are announced and players are warming up.
- 0': First Half begins.
- 2': Callan Elliot (Wellington Phoenix) wins a free kick on the right wing.
- 2': Foul by Dylan Wenzel-Halls (Brisbane Roar FC).
- 5': Offside, Wellington Phoenix. Matti Steinmann tries a through ball, but Gary Hooper is caught offside.
- 6': Foul by Te Atawhai Hudson-Wihongi (Wellington Phoenix).
- 6': Scott McDonald (Brisbane Roar FC) wins a free kick in the attacking half.
- 9': Attempt saved. Ulises Dávila (Wellington Phoenix) left footed shot from outside the box is saved in the bottom right corner. Assisted by Matti Steinmann.
- 9': Corner, Wellington Phoenix. Conceded by Jamie Young.
- 9': Foul by Te Atawhai Hudson-Wihongi (Wellington Phoenix).
- 9': Jamie Young (Brisbane Roar FC) wins a free kick in the defensive half.
- 10': Tom Aldred (Brisbane Roar FC) is shown the yellow card for a bad foul.
- 11': Foul by Cameron Devlin (Wellington Phoenix).
- 11': Jay O'Shea (Brisbane Roar FC) wins a free kick on the left wing.
- 12': Foul by Dylan Wenzel-Halls (Brisbane Roar FC).
- 12': Liberato Cacace (Wellington Phoenix) wins a free kick in the defensive half.
- 12': Bradden Inman (Brisbane Roar FC) wins a free kick in the attacking half.
- 12': Foul by Matti Steinmann (Wellington Phoenix).
- 12': Matti Steinmann (Wellington Phoenix) is shown the yellow card for a bad foul.
- 13': Attempt blocked. Dylan Wenzel-Halls (Brisbane Roar FC) right footed shot from the left side of the box is blocked.
- 14': Attempt missed. Dylan Wenzel-Halls (Brisbane Roar FC) right footed shot from outside the box misses to the left. Assisted by Danny Kim.
- 16': Corner, Wellington Phoenix. Conceded by Corey Brown.
- 20': Attempt missed. Dylan Wenzel-Halls (Brisbane Roar FC) header from the centre of the box misses to the right. Assisted by Corey Brown with a cross.
- 20': Attempt blocked. Dylan Wenzel-Halls (Brisbane Roar FC) right footed shot from the centre of the box is blocked.
- 23': Foul by Jay O'Shea (Brisbane Roar FC).
- 23': Reno Piscopo (Wellington Phoenix) wins a free kick in the attacking half.
- 23': Corner, Wellington Phoenix. Conceded by Corey Brown.
- 24': Attempt saved. Steven Taylor (Wellington Phoenix) header from the centre of the box is saved in the top left corner. Assisted by Ulises Dávila with a cross.
- 24': Corner, Wellington Phoenix. Conceded by Jamie Young.
- 25': Corner, Wellington Phoenix. Conceded by Tom Aldred.
- 27': Attempt blocked. Dylan Wenzel-Halls (Brisbane Roar FC) header from the centre of the box is blocked. Assisted by Jay O'Shea with a cross.
- 27': Corner, Brisbane Roar FC. Conceded by Callan Elliot.
- 28': Attempt blocked. Macaulay Gillesphey (Brisbane Roar FC) header from the centre of the box is blocked. Assisted by Bradden Inman with a cross.
- 28': Attempt blocked. Corey Brown (Brisbane Roar FC) left footed shot from outside the box is blocked.
- 29': Attempt saved. Dylan Wenzel-Halls (Brisbane Roar FC) left footed shot from the left side of the box is saved in the top centre of the goal. Assisted by Scott McDonald.
- 29': Corner, Brisbane Roar FC. Conceded by Stefan Marinovic.
- 30': Attempt blocked. Danny Kim (Brisbane Roar FC) right footed shot from outside the box is blocked. Assisted by Dylan Wenzel-Halls.
- 30': Attempt blocked. Scott McDonald (Brisbane Roar FC) right footed shot from the centre of the box is blocked. Assisted by Tom Aldred.
- 30': Corner, Brisbane Roar FC. Conceded by Te Atawhai Hudson-Wihongi.
- 31': Attempt missed. Bradden Inman (Brisbane Roar FC) right footed shot from outside the box misses to the left. Assisted by Scott McDonald.
- 33': Attempt saved. Dylan Wenzel-Halls (Brisbane Roar FC) right footed shot from the right side of the box is saved in the bottom right corner. Assisted by Jay O'Shea.
- 35': Bradden Inman (Brisbane Roar FC) wins a free kick in the defensive half.
- 35': Foul by Cameron Devlin (Wellington Phoenix).
- 35': Foul by Jack Hingert (Brisbane Roar FC).
- 35': Reno Piscopo (Wellington Phoenix) wins a free kick in the defensive half.
- 36': Hand ball by Callan Elliot (Wellington Phoenix).
- 38': Corner, Wellington Phoenix. Conceded by Jack Hingert.
- 39': Attempt missed. David Ball (Wellington Phoenix) header from the centre of the box is close, but misses the top right corner. Assisted by Reno Piscopo with a cross following a corner.
- 40': Callan Elliot (Wellington Phoenix) wins a free kick in the defensive half.
- 40': Foul by Dylan Wenzel-Halls (Brisbane Roar FC).
- 45': Foul by Jay O'Shea (Brisbane Roar FC).
- 45': Reno Piscopo (Wellington Phoenix) wins a free kick in the attacking half.
- 45': Attempt saved. Gary Hooper (Wellington Phoenix) right footed shot from the right side of the box is saved in the top left corner.
- 45'+1': Bradden Inman (Brisbane Roar FC) wins a free kick on the right wing.
- 45'+1': Foul by Cameron Devlin (Wellington Phoenix).
- 45'+2': First Half ends, Wellington Phoenix 0, Brisbane Roar FC 0.
- 45': Second Half begins Wellington Phoenix 0, Brisbane Roar FC 0.
- 46': Corner, Brisbane Roar FC. Conceded by Matti Steinmann.
- 47': Attempt missed. Scott Neville (Brisbane Roar FC) right footed shot from the right side of the six yard box misses to the right. Assisted by Jay O'Shea with a cross following a corner.
- 48': Callan Elliot (Wellington Phoenix) wins a free kick in the attacking half.
- 48': Foul by Dylan Wenzel-Halls (Brisbane Roar FC).
- 49': Attempt saved. Te Atawhai Hudson-Wihongi (Wellington Phoenix) right footed shot from outside the box is saved in the bottom left corner.
- 50': Offside, Brisbane Roar FC. Jay O'Shea tries a through ball, but Jack Hingert is caught offside.
- 50': Foul by Reno Piscopo (Wellington Phoenix).
- 50': Jack Hingert (Brisbane Roar FC) wins a free kick in the defensive half.
- 52': Attempt blocked. David Ball (Wellington Phoenix) left footed shot from the right side of the box is blocked. Assisted by Ulises Dávila.
- 53': Foul by Matti Steinmann (Wellington Phoenix).
- 53': Scott McDonald (Brisbane Roar FC) wins a free kick on the right wing.
- 54': Attempt blocked. Jay O'Shea (Brisbane Roar FC) right footed shot from the centre of the box is blocked. Assisted by Bradden Inman.
- 54': Foul by Jay O'Shea (Brisbane Roar FC).
- 54': Gary Hooper (Wellington Phoenix) wins a free kick in the defensive half.
- 55': Foul by Tom Aldred (Brisbane Roar FC).
- 55': Ulises Dávila (Wellington Phoenix) wins a free kick in the attacking half.
- 56': Attempt missed. Ulises Dávila (Wellington Phoenix) left footed shot from outside the box is close, but misses to the left from a direct free kick.
- 57': Foul by Corey Brown (Brisbane Roar FC).
- 57': Ulises Dávila (Wellington Phoenix) wins a free kick in the attacking half.
- 58': Foul by Jack Hingert (Brisbane Roar FC).
- 58': Liberato Cacace (Wellington Phoenix) wins a free kick on the left wing.
- 60': Attempt saved. Gary Hooper (Wellington Phoenix) right footed shot from outside the box is saved in the centre of the goal. Assisted by Ulises Dávila.
- 61': Goal! Wellington Phoenix 0, Brisbane Roar FC 1. Scott McDonald (Brisbane Roar FC) left footed shot from outside the box to the bottom left corner. Assisted by Jay O'Shea.
- 62': Substitution, Wellington Phoenix. Alex Rufer replaces Cameron Devlin.
- 63': Foul by Gary Hooper (Wellington Phoenix).
- 63': Tom Aldred (Brisbane Roar FC) wins a free kick in the defensive half.
- 63': Foul by Jack Hingert (Brisbane Roar FC).
- 63': Liberato Cacace (Wellington Phoenix) wins a free kick in the defensive half.
- 64': Attempt saved. Jay O'Shea (Brisbane Roar FC) right footed shot from more than 35 yards is saved in the bottom right corner. Assisted by Jack Hingert.
- 64': Attempt saved. Reno Piscopo (Wellington Phoenix) right footed shot from the left side of the box is saved in the centre of the goal. Assisted by Ulises Dávila.
- 64': Attempt blocked. David Ball (Wellington Phoenix) right footed shot from the right side of the box is blocked.
- 64': Corner, Wellington Phoenix. Conceded by Corey Brown.
- 65': Foul by Te Atawhai Hudson-Wihongi (Wellington Phoenix).
- 65': Jamie Young (Brisbane Roar FC) wins a free kick in the defensive half.
- 66': Attempt blocked. Ulises Dávila (Wellington Phoenix) right footed shot from outside the box is blocked. Assisted by Gary Hooper with a headed pass.
- 66': Substitution, Brisbane Roar FC. Matthew Ridenton replaces Dylan Wenzel-Halls.
- 67': Attempt missed. Gary Hooper (Wellington Phoenix) right footed shot from very close range is close, but misses to the right. Assisted by Liberato Cacace.
- 70': Attempt saved. Ulises Dávila (Wellington Phoenix) right footed shot from the centre of the box is saved in the bottom right corner. Assisted by David Ball.
- 72': Attempt blocked. Scott McDonald (Brisbane Roar FC) right footed shot from the centre of the box is blocked. Assisted by Matthew Ridenton.
- 72': David Ball (Wellington Phoenix) wins a free kick in the attacking half.
- 72': Foul by Danny Kim (Brisbane Roar FC).
- 73': Substitution, Wellington Phoenix. Callum McCowatt replaces Ulises Dávila.
- 73': Attempt missed. Callan Elliot (Wellington Phoenix) left footed shot from the right side of the box misses to the left. Assisted by Matti Steinmann.
- 74': Foul by Matthew Ridenton (Brisbane Roar FC).
- 74': Reno Piscopo (Wellington Phoenix) wins a free kick in the attacking half.
- 74': Matthew Ridenton (Brisbane Roar FC) is shown the yellow card for a bad foul.
- 75': Foul by Matthew Ridenton (Brisbane Roar FC).
- 75': Liberato Cacace (Wellington Phoenix) wins a free kick on the left wing.
- 76': Attempt missed. Te Atawhai Hudson-Wihongi (Wellington Phoenix) header from the centre of the box misses to the right. Assisted by Reno Piscopo with a cross following a set piece situation.
- 77': Attempt saved. Liberato Cacace (Wellington Phoenix) left footed shot from the left side of the box is saved in the centre of the goal. Assisted by Te Atawhai Hudson-Wihongi.
- 80': Corey Brown (Brisbane Roar FC) wins a free kick in the defensive half.
- 80': Foul by Callan Elliot (Wellington Phoenix).
- 80': Substitution, Wellington Phoenix. Jaushua Sotirio replaces Reno Piscopo.
- 82': Liberato Cacace (Wellington Phoenix) hits the right post with a header from the centre of the box. Assisted by Alex Rufer.
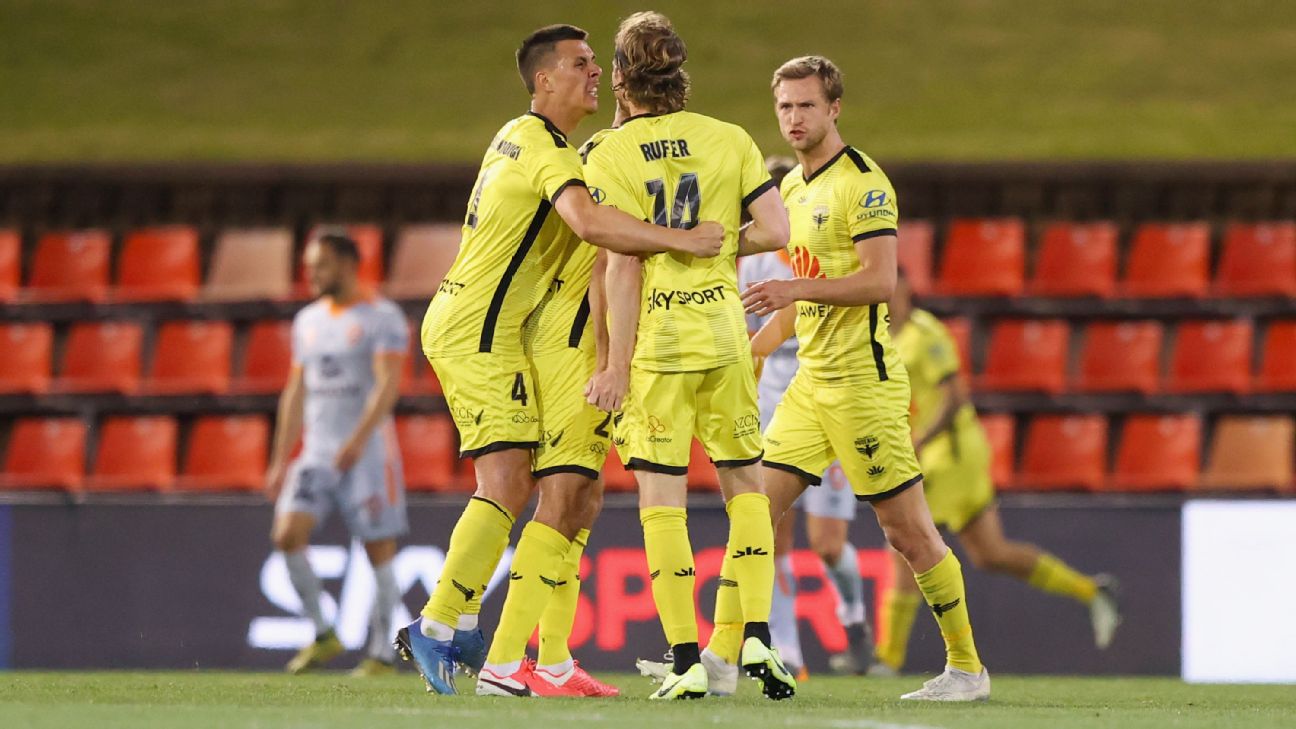
- 82': Goal! Wellington Phoenix 1, Brisbane Roar FC 1. Gary Hooper (Wellington Phoenix) right footed shot from the centre of the box to the bottom left corner.
- 84': Attempt missed. Bradden Inman (Brisbane Roar FC) right footed shot from the left side of the box is close, but misses to the right. Assisted by Corey Brown.
- 87': Substitution, Brisbane Roar FC. Aaron Amadi-Holloway replaces Bradden Inman.
- 88': Foul by Callum McCowatt (Wellington Phoenix).
- 88': Jay O'Shea (Brisbane Roar FC) wins a free kick in the defensive half.
- 89': Attempt saved. Matthew Ridenton (Brisbane Roar FC) left footed shot from the right side of the box is saved in the bottom left corner.
- 89': Corner, Brisbane Roar FC. Conceded by Stefan Marinovic.
- 89': Attempt missed. Jay O'Shea (Brisbane Roar FC) right footed shot from outside the box is too high. Assisted by Corey Brown following a corner.
- 90': Corner, Wellington Phoenix. Conceded by Macaulay Gillesphey.
- 90'+1': Attempt missed. Jaushua Sotirio (Wellington Phoenix) right footed shot from the left side of the box is too high. Assisted by Callum McCowatt following a corner.
- 90'+2': Foul by Jaushua Sotirio (Wellington Phoenix).
- 90'+2': Scott Neville (Brisbane Roar FC) wins a free kick in the defensive half.
- 90'+2': Foul by Aaron Amadi-Holloway (Brisbane Roar FC).
- 90'+2': Liberato Cacace (Wellington Phoenix) wins a free kick in the defensive half.
- 90'+3': Attempt missed. Jaushua Sotirio (Wellington Phoenix) left footed shot from the centre of the box is high and wide to the left. Assisted by Gary Hooper.
- 90'+5': Attempt missed. Callan Elliot (Wellington Phoenix) header from the centre of the box misses to the left. Assisted by Liberato Cacace with a cross.
- 90'+5': Second Half ends, Wellington Phoenix 1, Brisbane Roar FC 1.
- 0': Match ends, Wellington Phoenix 1, Brisbane Roar FC 1.
Statistics
 BRI |
WEL |
|
|---|---|---|
| 16 | Fouls | 14 |
| 2 | Yellow Cards | 1 |
| 0 | Red Cards | 0 |
| 1 | Offsides | 1 |
| 5 | Corner Kicks | 8 |
| 8 | Saves | 4 |
| 42.5 | Possession | 57.5 |
| 20 | SHOTS | 21 |
| 5 | ON GOAL | 9 |
| 0.3 | On Target % | 0.4 |
| 0 | Penalty Goals | 0 |
| 0 | Penalty Kicks Taken | 0 |
| 301 | Accurate Passes | 469 |
| 407 | Passes | 551 |
| 0.7 | Pass Completion % | 0.9 |
| 5 | Accurate Crosses | 4 |
| 15 | Crosses | 23 |
| 0.3 | Cross % | 0.2 |
| 69 | Long Balls | 59 |
| 30 | Accurate Long Balls | 27 |
| 0.4 | Long Balls % | 0.5 |
| 9 | Blocked Shots | 3 |
| 7 | Effective Tackles | 6 |
| 12 | Tackles | 10 |
| 0.6 | Tackle % | 0.6 |
| 9 | Interceptions | 7 |
| 13 | Effective Clearances | 13 |
| 13 | Clearances | 13 |
Game Information
Venue: McDonald Jones Stadium
Location: Newcastle, New South Wales, Australia
A-League Men Standings
| # | TEAM | GP | GD | PTS |
|---|---|---|---|---|
| 1 | Wellington Phoenix | 5 | +5 | 10 |
| 2 | Western Sydney Wanderers FC | 5 | +4 | 8 |
| 3 | Sydney FC | 5 | +3 | 8 |
| 4 | Brisbane Roar FC | 4 | +2 | 8 |
Line-Ups
 Wellington Phoenix (4-4-2)
| No. | Name |
|---|---|
| 1 | Stefan Marinovic (GK) |
| 4 | Te Atawhai Hudson-Wihongi |
| 27 | Steven Taylor |
| 13 | Liberato Cacace |
| 17 | Callan Elliot |
| 5 | Ville Matti Steinmann  |
| 8 | Cameron Devlin |
| 7 | Reno Piscopo |
| 10 | Ulises Dávila |
| 88 | Gary Hooper |
| 9 | David Ball |
 Brisbane Roar FC (3-5-2)
| No. | Name |
|---|---|
| 21 | Jamie Young (GK) |
| 5 | Tom Aldred |
| 6 | Macaulay Gillesphey |
| 2 | Scott Neville |
| 8 | Danny Kim |
| 10 | Bradden Inman |
| 26 | Jay O'Shea |
| 3 | Corey Brown |
| 19 | Jack Hingert |
| 77 | Scott McDonald |
| 23 | Dylan Wenzel-Halls |
A-League Men News

Al Hassan Touré starred, Joey Garuccio saved Adelaide, and the pressure is already building at one of the A-League's biggest clubs -- all that and more in ESPN's Stocks Up, Stocks Down.

Western Sydney Wanderers chair Paul Lederer has hit out at what he has said is "totally unacceptable" policing of his club's supporters, labelling it excessive and declaring that "enough is enough."

The Phoenix are the A-League's only perfect team, the Jets are searching for answers, and Victory's Valadon scores a stunner -- all that and more in ESPN's Stocks Up, Stocks Down.

Unbundling from Football Australia was supposed to herald a new dawn for soccer Down Under. Instead, an ESPN investigation asks: are the A-Leagues at risk of collapse?

Talay's Wanderers dazzled, Melbourne's heavyweights misfired and an unexpected contender is already shaking up the A-League table.